*This feature could not have been possible without the help of many people. Please see the bottom of the page for many of the people involved.
Look Development
When I was hired onto the team, the map consisted of an After Effect video and a few documents explaining how the map would work in a general sense. Initially, my role was to re-model the level geometry into map geometry. Therefore the first step was to collect plenty of reference for the look, while also getting a prototype up and running.
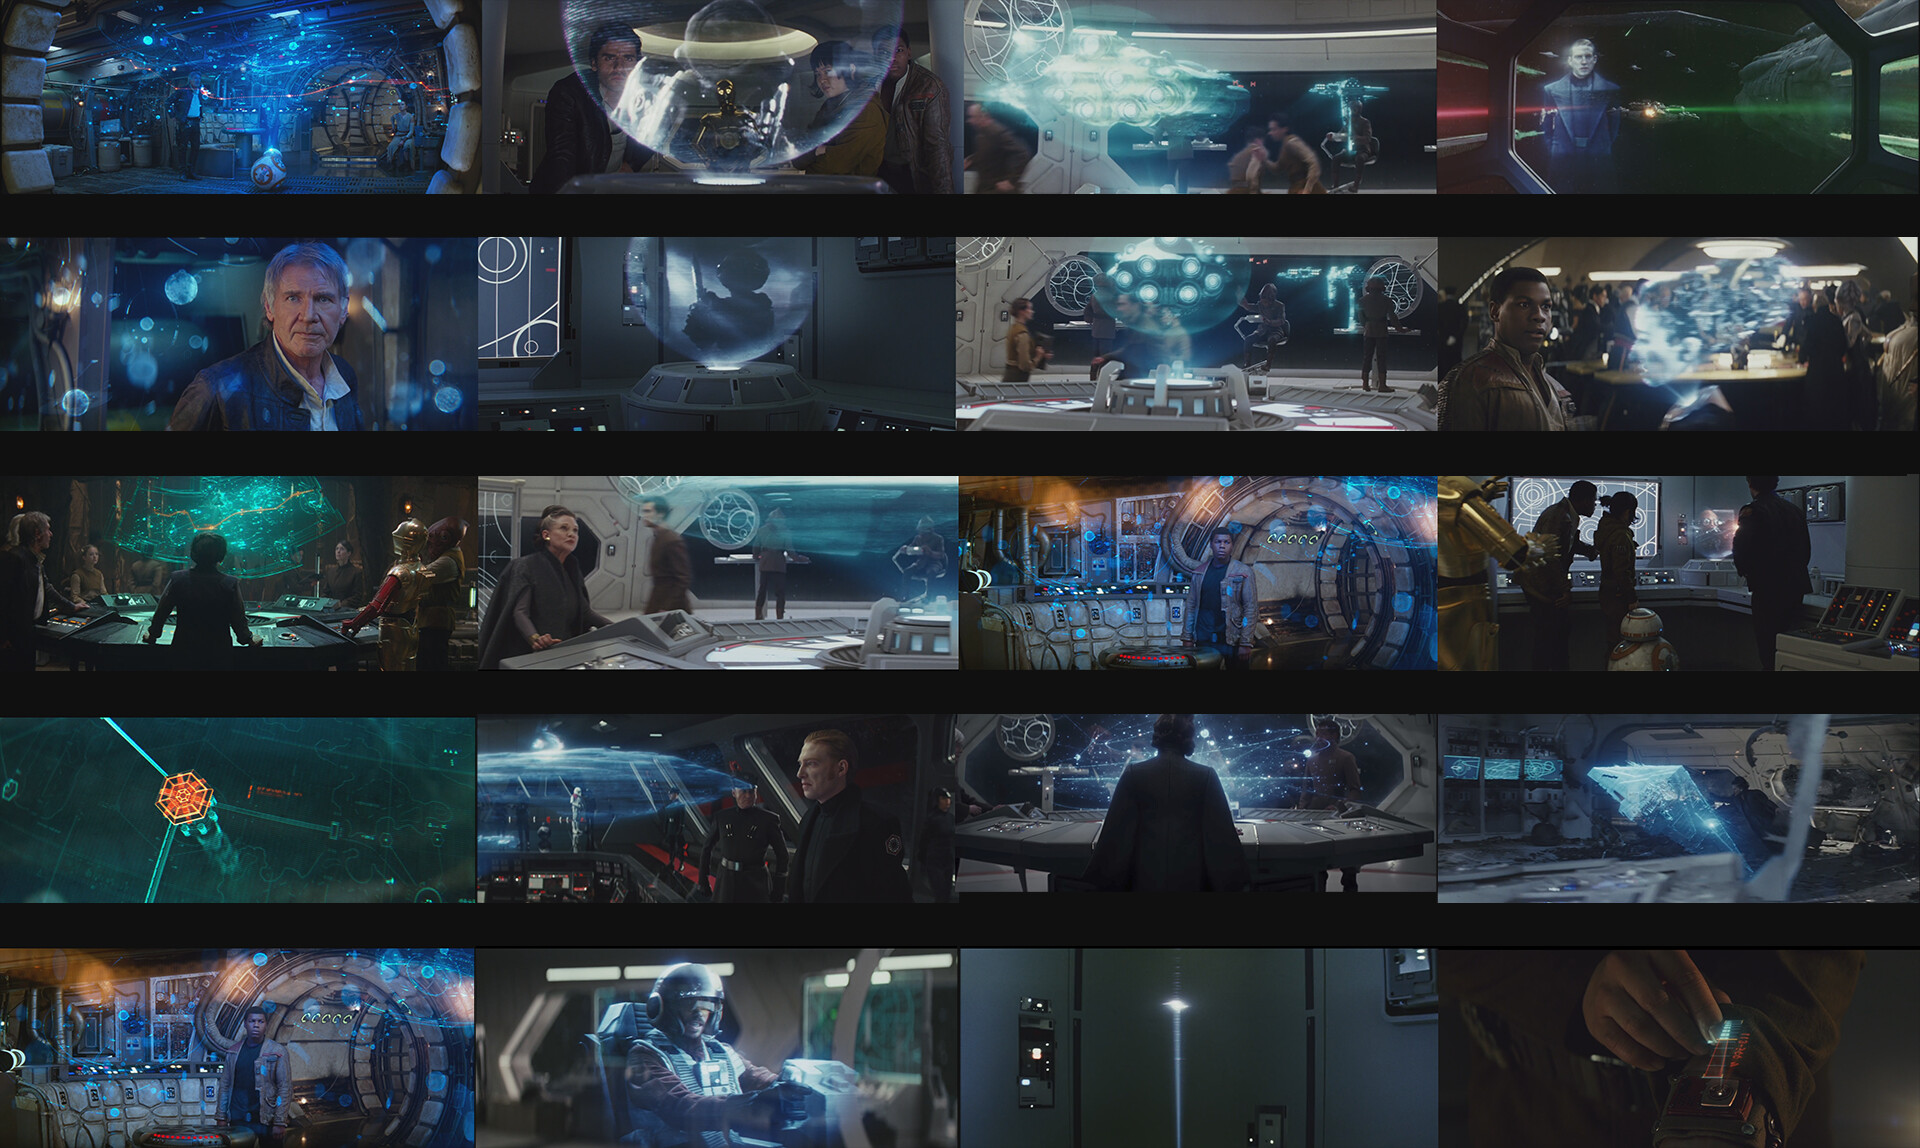
When looking for reference, we focused on finding not only Star Wars hologram references, but also any hologram-esque things that interested us, while still keeping in the Star Wars universe. Here is the reference board created for the Star Wars reference:
Movie Reference Board:
In order to get a working prototype, I started creating what became the World Map System in Unreal Engine’s visual scripting, Blueprints. First, I needed to create a system to render the meshes and display it in front of the player. The first implementation was a Scene Capture system which used multiple scene capture cameras that rendered to a couple of render textures, one for each layer of geometry, which were composited together in a post-process material, to be used as a blendable in a Post-Process volume. The scene captures were set for “Show Only Actors,” and the blueprint would inform the scene captures which actors they would be rendering.
After getting a working render pipeline setup, the next step was to start implementing a way for the player to control the map geometry. Once the player opened the map they were unable to move the character so that all movement is transferred to the map. With this in mind, I implemented a transform system to allow the player to move the map however they wanted, along with a line trace collision system so the player was able to select sections in the map. Initially, this was done to help differentiate sections in the map so the player has something to focus on, however later implementation resulted in selectable regions in order to display exploration progress and collectible count.
These systems were later transferred to code to account for Blueprint performance issues.
During the Look Dev stage, the existing level geometry was remodeled for the map using a mixture of Maya and Zbrush. Meshes were individually exported from Unreal and used as a template to model on top of. As the project scope grew, I discovered this would not be optimal for the amount of planets in development and the speed at which they changed. I sought to create an automated pipeline that would save significant time and remain up to date throughout the project.
Automated Pipeline
The goal of the pipeline was to reduce the amount of time needed to model, UV, bake, light and create collision. Each module was created and sequenced in a way that the user was able to either run the whole pipeline for an entire planet, or a specific module for one section. The user was also able to specify the polycount and voxel size during the Mesh Compilation portion of the pipeline.
During initial tests for modeling a section, it would take an average of 12 hours working to create one section from start to finish. The average section was able to run through pipeline between 5-20 minutes, depending on the complexity and size of the section that ended up saving an average of 7,200 hours a week.
Map Section Volumes were trigger volumes that helped in two ways. First, when a player entered a new section, the corresponding geometry would appear in the map. The second use for Map Section Volumes was to help export the level geometry for the map section corresponding to the volume. A console command was called to export all meshes that resided inside the Map Section Volume. A 3D artist imported the exported files into Maya, and removed unneeded geometry and prepped the section for the automated pipeline.
The pipeline was built using Python, headless Autodesk Maya, Houdini, and Houdini Engine for Maya. Here is the general flow of the pipeline:

Mesh Compilation, UV and Collision were modules created in Houdini and exported as an HDA. During the pipeline, headless Maya imported the HDA via Houdini Engine for Maya, and ran the module per map section. The Ambient Occlusion and Light Bakes were done using Maya's internal system TURTLE.
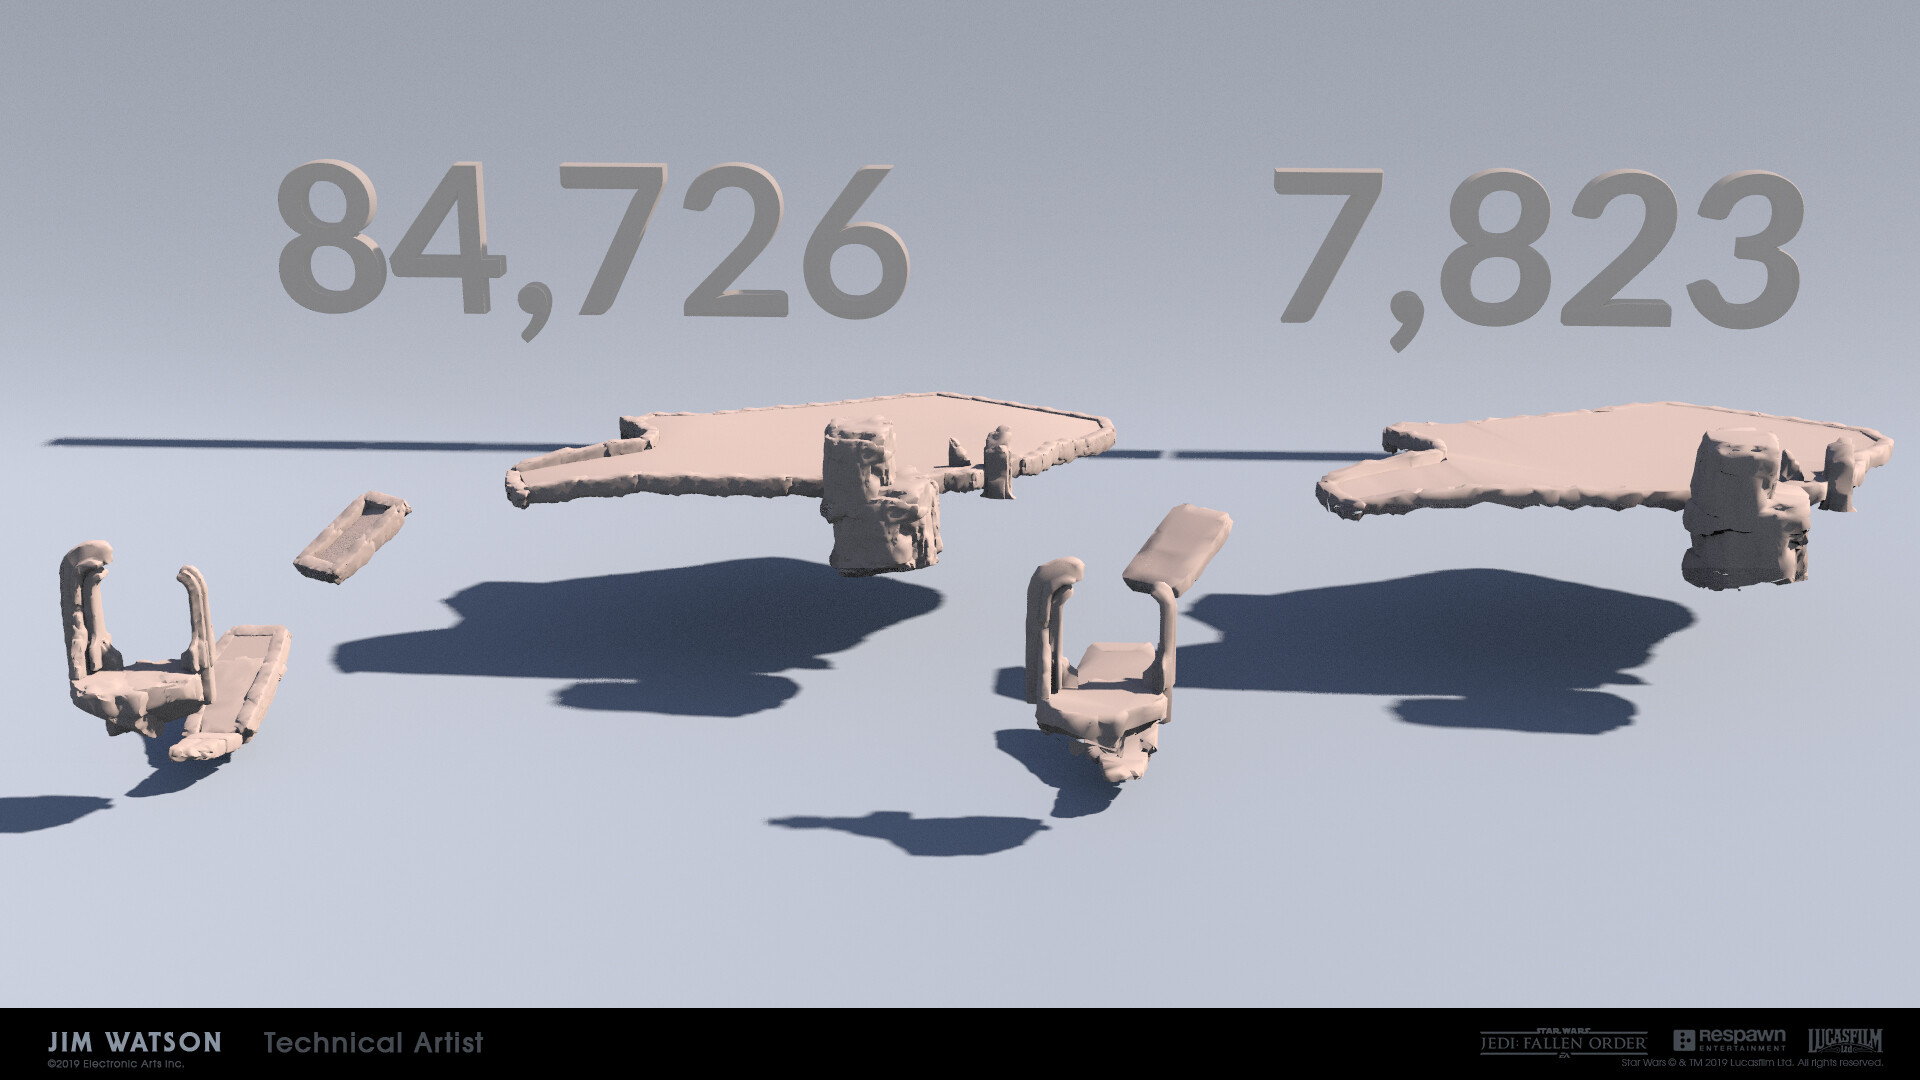
The first module automated the modeling of meshes to be used in game. The general idea was to remesh the assets and reduce triangle count via Houdini. The geometry was converted to VDBs at a calculated voxel size (depending on the total volume of the meshes) or user-defined voxel size, then converted back to polygons where it entered a couple of testing algorithms. It first ran through the faces oriented towards Y+ and selectively reduced those faces, then reduced all other faces. This was done to reduce polygon count and created an easier setup for the next algorithm, which determined hard edges that defined the silhouette, while the rest of the mesh was reduced for performance. Another standalone module was created near the end of the project to reduce meshes even more if need be.
After the meshes and textures were created or updated, and saved in the proper file structure, they were imported/re-imported into the engine. Each planet had their own map level, which these assets were brought into. They were then connected with the volumes mentioned above (Map Section Volumes), and to their specific map section. After everything had been hooked up, the user "Builds World Map Data," which connected the static mesh actors and map section volumes to the map section, via the World Map Data Owner.
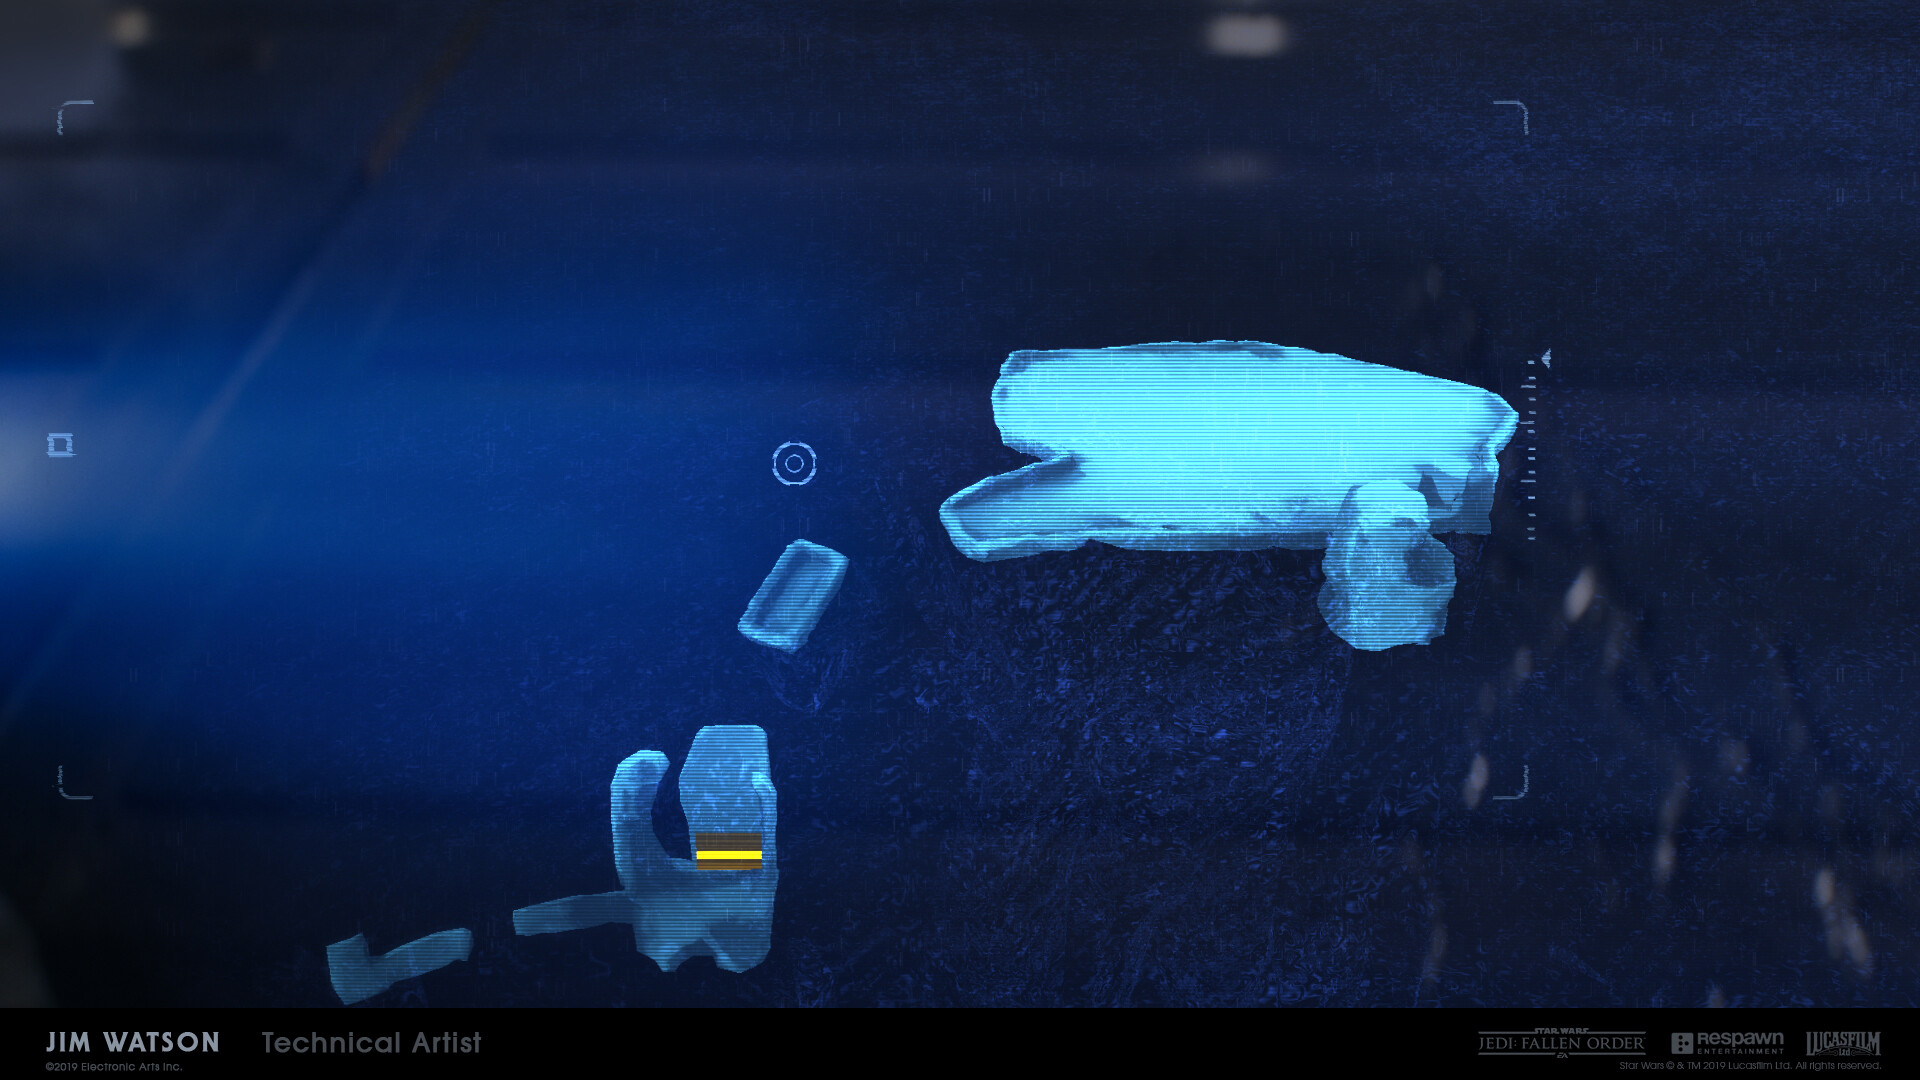
Here is the resulting game mesh after running through the pipeline and implementing in game:
In-Game Implementation
The map connected and was apart of multiple systems throughout the game. This section will go over only the most used systems of the map in the engine.
General Map Setup
The map was comprised of a main Blueprint, with 17 World Map Blueprint Components connected to it. Each component held different functionality for various systems (e.g. one component that holds all of the logic regarding the Holotable and ship logic). Components varied from Audio, Custom Animation, Cinematics, Mission Objectives, Location Related Logic, Doors and Gateways, UI, Colors, and Tutorial.
Rendering
To help with readability, the map had an interior level system. An interior level consisted of map sections that were assigned to that interior level. This was done because the map needed a way to differentiate between "outside" and "inside" areas (e.g. A cave versus the surface level above a cave). Total number of interior levels varied from 2 to 5 throughout the game.
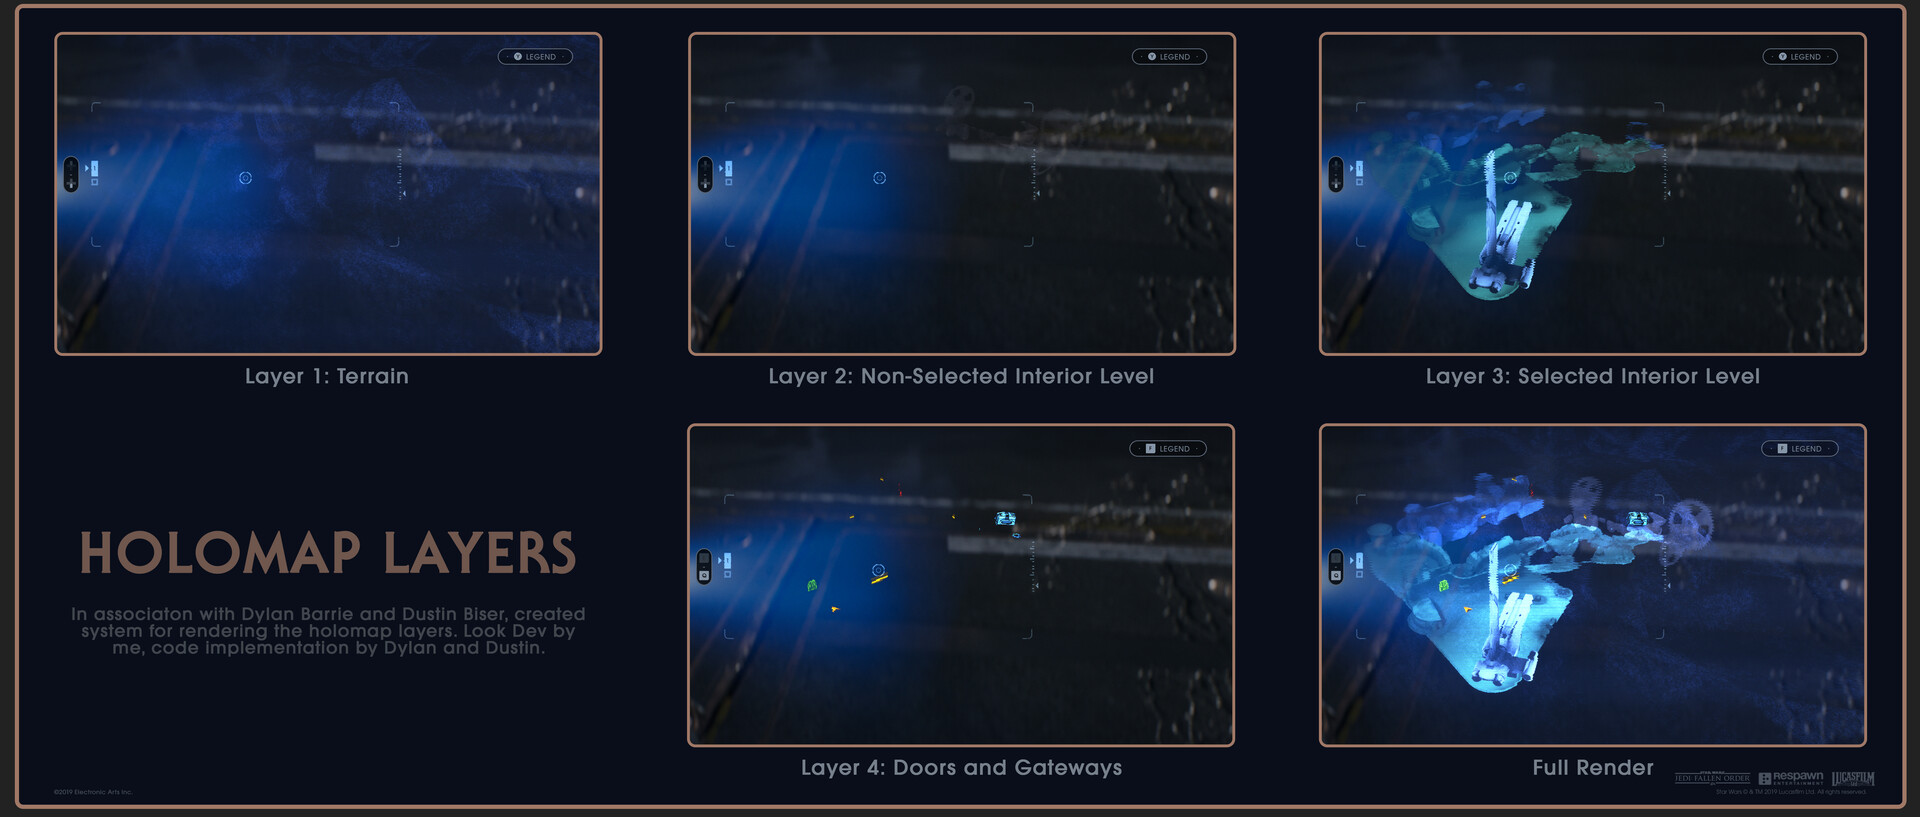
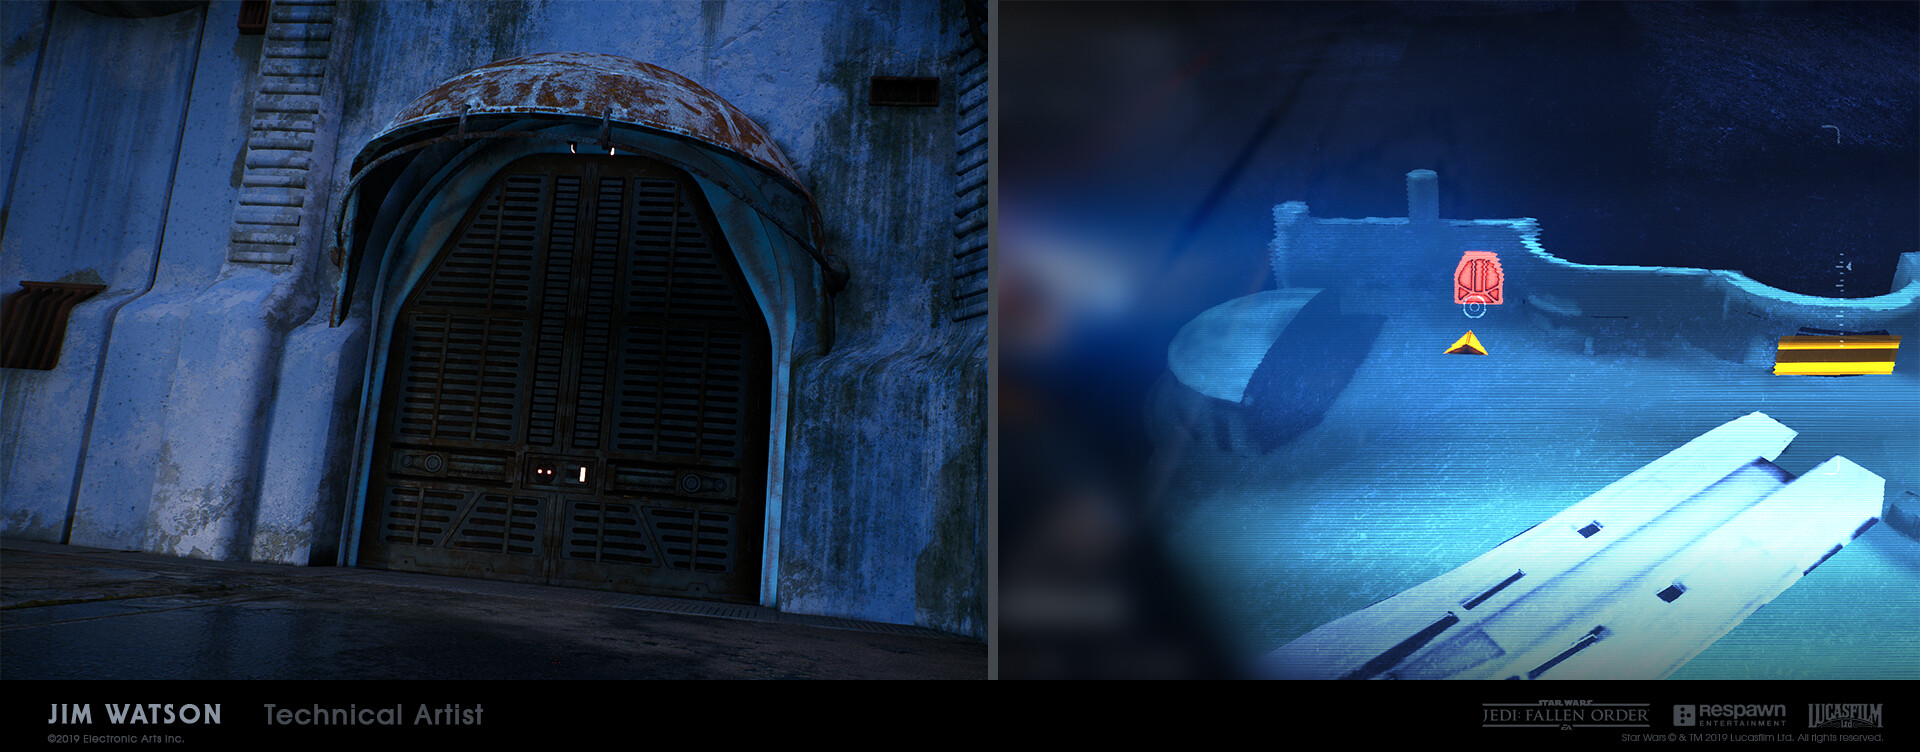
Thanks to Dustin Biser and Dylan Barrie, the map was rendered in a custom pass in the render stack. The map geometry was placed in front of the player, with a material that was only read from the map rendering system. There are then 4 layers that were composited on top of each other. Each layer corresponded to a specific function. Layer 1 held terrain meshes, Layer 2 held map sections that were not on the selected interior level, Layer 3 held map sections that were on the selected interior level, and all doors and gateways were rendered in Layer 4.
The map used a mesh as a mask in the render pass to simulate a proper 3D mask that would be used in an actual hologram. The mask shape was interchangeable, and also used the color of the material to help determine the mask brightness and alpha to be used.
Holotable
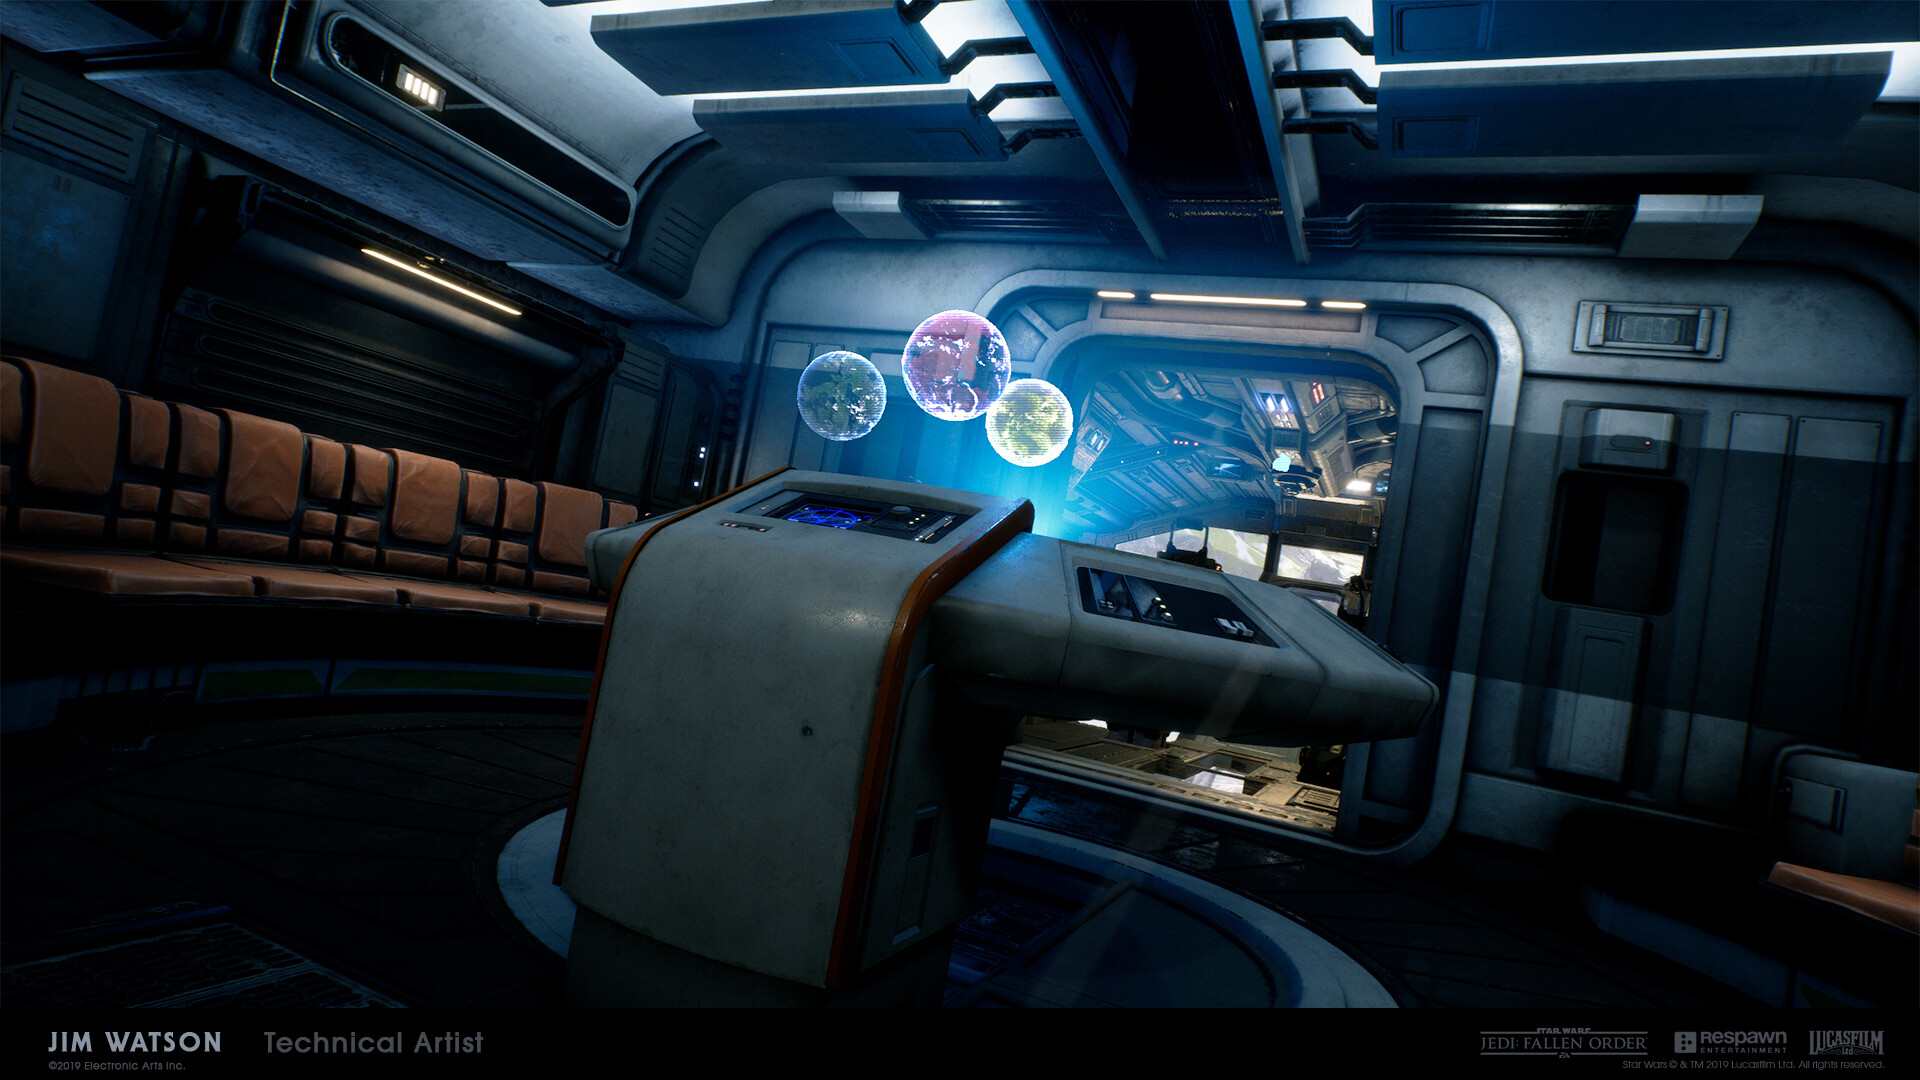
The holotable was essentially the same map system, but all elements were placed on top of the holotable itself instead of in front of the player. Different functionality was also enabled for the Holotable in order to tell the planet hop system which planet the player wanted travel to. When the player walked onto the ship, the player became unable to manually open the map, since it has been activated on the holotable. While the player was on the ship, the holotable map remained open but was not usable until the player interacted with the holotable.
Connecting In-Game Actors to Map Actors
The map needed to communicate to various elements throughout the game, including doors, elevators, shortcut ropes, set pieces, etc. Therefore, a system needed to be created for the in-world objects to broadcast information from that specific actor to the map version of that actor. Each actor had a component added to it that directly spoke to the world map system. When the user built the world map data, a World Map actor was created in that spot to represent the in-game asset and its states.
Once the component was added to the actor, similar logic from the actor needed to be passed through the component to the map system. For example, when the player interacted with a one-way door, the component broadcast unlock status to the world map system. The map system then took that information, and ran logic depending on the type of object it was. For the one-way door, the map hid that door, since the player had opened the door. However, for a push bridge, once the player interacted with it (e.g. pushed the bridge), the bridge stayed visible on the map, but entered a different transform and color state.
Conclusion
To reiterate the idea from above, this was a team effort, and could not be possible without so many talented people working on this team. It was a privilege to see this feature to the end. The map changed drastically during my time working on the map, from document stage to ship. The following video shows some of the iterations that was made:
Thank you for reaching the end of that wall of text. However, only 95% of this post has been explored at this point. Please read through the credits to explore it to 100%!
Credits:
Jim Watson - Technical Artist, Technical Designer, 3D Artist
Dustin Biser - Programmer, Software Engineer
Jason Soss - 3D Artist
Kevin Kvalstad - UI/UX Lead
Dylan Barrie - Graphics Programmer
Jason Burton - VFX Lead, BD's Hologram Cone
Wesley Griffith - Mantis Interior
Kevin Duong - Mantis Interior
Hansoo Im - Mantis Lighting
Hanhee Lee - Galaxy Map Planet Textures
George Rushing - Galaxy Map Planet Textures
Ethan Ayer - Galaxy Map Planet Textures
Christopher Berry - Technical Art Assistance
Brandon Kelch - Technical Design Assistance
Robert West - Technical Design Assistance
Bill Gahr - Technical Design Assistance
Kevin Milmoe - Houdini Assistance
Nate Rulli - 3D Optimization Assistance
Steve Hong - 3D Optimization Assistance
Dave Miragliotta - 3D Optimization Assistance
Rich Phim - Producer
Jonas Lundquist - Producer
Paul Hatfield - Producer
Rhonda Cox - Producer
All of the environment artists, a good portion of the automation pipeline inputs were made from level assets
(Blog Post - 100% Explored)